Thursday, December 18, 2014

Crispelle

Hi Everyone!
Continuing with our traditional Christmas baking, today we have made an old favourite.  Crispelle were a very popular treat that Nonnina's mom made back home.  Prior to coming to Canada, they could not really afford to buy the ingredients to make cookies so many of their go to treats were made from simple ingredients - mainly savoury, and fried.  Crispelle can be made in whichever way you would like and that is the beauty of this simple pastry; you can make it in strips like Nonnina's mom or in circles which is how I enjoy them.  They can even be paired with different ingredients.  Nonnina either makes them plain, with golden raisins or traditionally with Baccala (salt water cod).

Any way you choose to enjoy this dessert, it is guaranteed to be delicious!

Ingredients
  • 4 1/12 cups of water
  • 4 tsp of yeast for bread
  • 4 tsp of sugar
  • 8 tbsp of extra virgin olive oil
  • 4 tsp of salt
  • 10 cups of flour
  • Sugar for dusting
Preparation
1. In a large bowl pour together the water, yeast and sugar and let it sit until the yeast bubbles at the top.

2. Once the yeast has bubbled to the top, pour the mix into the food processor, add the oil and pulse until combined.
3.  Add the flour to the food processor once cup at a time, and pulse until all combined.
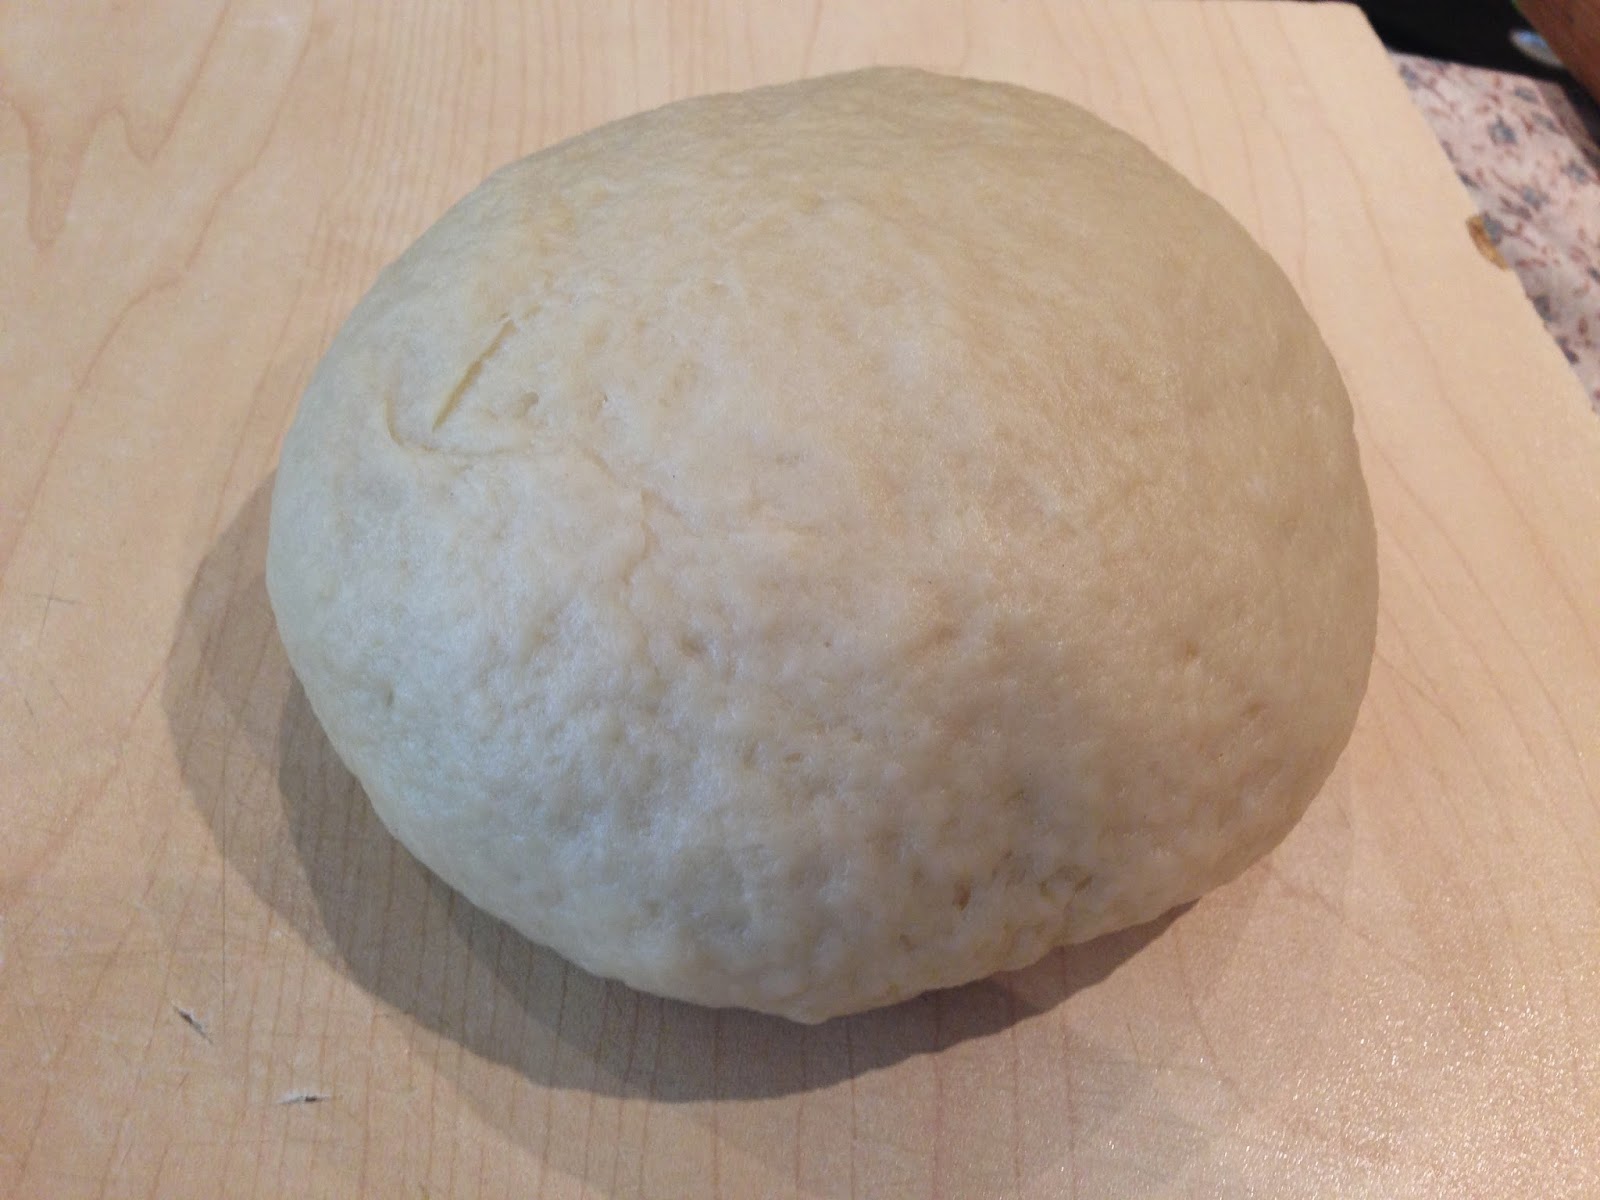
4. Grease and flower a large bowl, and place the dough inside. Cover the bowl with a tea towel and set aside for about 3 hours to rise.
5. Once risen, fill a large pan with sunflower or canola oil and stretch strips of the dough apart, laying them gently in the oil.

 6. Flip them over to cook on both sides and remove them using a slotted spoon when they are golden.  Put them on paper towels to drain.
7. Sprinkle them with a dusting of sugar to finish.  Do this as soon as they come out of the oil so that the sugar sticks.

During this holiday season make sure to visit Nonnina's Kitchen for new traditional Italian Goodies!

Don't forget to follow my blog to get new recipes and see what's cooking in Nonnina's Kitchen EVERY week!

Buon Apetito!

With Love From, Nonnina!

Wednesday, December 17, 2014

Biscotti with Honey Almonds

Hi Everyone,
Welcome back to Nonnina's Kitchen!  we have been very busy baking for the Christmas holidays so over the next couple of days keep an eye put for some delicious traditional Italian holiday treats! 
The recipe we made for today's blog post were Biscotti with honey almonds, which was a recipe that was given to Nonnina from her niece Nadia in Calgary.  Like in any kitchen, we came across a few bumps along the road, but that's what makes the end product that much more enjoyable.  Baking with Nonnina is always a laugh, and its times where things don't go quite like we planned that are the best!  We hope that you and your families have just as much fun as we did throughout our holiday baking!
Enjoy!
Ingredients
Dough
-  3 cups of honey
-  3 eggs
-  2 teaspoons of baking powder
- 1 tsp of baking soda
- 7 cups of flour
- 1/2 tsp salt

Filling
- 2 cups of almonds 
- 2 tbsp of cocoa

Directions
1. Pour the honey into a large pan and warm it up.  Do not make it too hot about a minute, then remove it from the heat.
2. Pour the honey into a mixing bowl and add eggs one by one to the honey. After each egg mix until it is combined.  Do not let the eggs curdle.  Put the excess honey from the pan aside you will use it later
3. In a separate bowl mix the flour, baking powder, salt and baking soda. 

4. Add the dry ingredients to the mixing bowl with the wet ingredients a little bit at a time. ,I'd until it forms a dough.  Put it in a bowl, cover it and let it rest in the fridge while you prepare the filling.
5. Coat the almonds in the pan with the excess honey you put aside.  Make sure to reheat the honey first.
6.  Let the almonds cool off.
7. Add cocoa powder to the almonds and mix until coated.
8. Dust your cutting board with flour, cut a piece of dough and roll it our into a log.  
9. Flatten the log using a rolling pin and fill it with the coated almonds.
NONNINA'S TIP* You can substitute the almonds with the Cillipieni filling as another option

10. Fold in both sides and move the filled log to a cookie sheet coated with parchment paper.
11. Bake in the oven at 350 for 20 minutes
12. Slice the logs into cookies


NONNINA'S TIP* you can put the sliced cookies back into the oven to make them crunchy

During this holiday season make sure to visit Nonnina's Kitchen for new traditional Italian Goodies!

Don't forget to follow my blog to get new recipes and see what's cooking in Nonnina's Kitchen EVERY week!

Buon Apetito!

With Love From, Nonnina!

Tuesday, October 28, 2014

Ricotta and Prosciutto Cannelloni


Hello All, 

Today Nonnina and I are working hard making some homemade pasta. As an italian one should always know how to make some type of pasta whether it is gnocchi or ravioli; having a recipe in your back pocket is a necessity. The first time Nonnina ever made pasta by herself was when she was only nine years old in her home in Italy. She had made fettuccini and it was eggless, only flour and water is the way they used to make it back home.  She told me that once she had finished, her brother Mike yelled at her saying her pasta was too soft, but her mother quickly came to her defence saying "you're lucky she made soft pasta otherwise you'd have no food!"

Nonnina's pasta of choice here in Canada has always been cannelloni.  Ever since I was a little girl coming over Nonnina's house for Sunday lunch or for a birthday party, I always remember her serving her homemade cannelloni.  This recipe was completely made up by Nonnina and through trial and error she finally came up with the perfect recipe that everyone loves! She's had to make some adjustments for people over the years but this has only helped make the recipe more versatile as Nonnina now makes the cannelloni gluten free on occasions.

The reason we're making cannelloni today is because Nonnina invited us all over for dinner on Friday to see my moms godmother who is coming to visit all the way from San Diego.  

October is #NationalPastaMonth and in celebration, Let's Make Pasta!
Ingredients

Dough

- 3 cups of flour
- 4 eggs
- 1 tsp of salt

Filling 
- 900g of ricotta
- 1 ball of Fior Di Latte Mozzarella 
- 1 cup of grated Parmesan cheese
- 250g of chopped prosciutto
- 1 tsp of salt and pepper
- 2 eggs
- 1 tbsp of finely chopped parsley 

Directions

1. Pour the flour on a cutting board or flat surface making a hole in the centre to put the eggs.
2. Add the eggs and salt and whisk together until combined.

3. Whisk the eggs in the centre first then gradually pull the flour from the sides until everything is combined.
4. When the starts to become firmer, begin kneading with your hands ( add a couple tablespoons of water if it becomes too dry) knead for approximately 5 minutes or until it becomes smooth.
NONNINA'S TIP* you can make the dough ahead of time and leave it in the fridge, it can stay for 2-3 days 

5. Put the dough under a ceramic bowl and let it rest until your filling is prepared.
6. Add the ricotta to a medium sized bowl.
7. Take 1 ball of mozzarella and grate it into the ricotta and mix until combined.
8. On a cutting board, finely chop the prosciutto, then add it to the bowl and mix until combined add salt and pepper.
9. Beat 2 eggs in a small bowl and then add it to the filling and mix, this is to help the filling hold together.
10. Add parsley and mix until all ingredients are combined.
11. On a flat surface knead the dough for a bit again into a long log shape.

12. Cut the log into pieces, sprinkle with flour and press them down so they become flat.
13. Using a pasta machine, you will pass the dough through a total of 3 times.  First time on number 1, second time on number 3 and then the third time on number 5 so that the sheets are nice and thin.
 
14. Dust the sheets with flour so that they do not stick.
15. Cut each pasta sheet into approximately 3 squares, discarding both ends.
16. Bring a pot of water to boil, add salt to the water and add a few pieces of pasta at a time, let cook for 30 seconds then remove and put in cold water. Do this for the rest of the pasta. 
NONNINA'S TIP* Remember only boil a few pieces at a time or they will stick together

16. Lay the pasta on a cloth, pat dry and begin to fill.
17. Add 2 tbsps of filling to the centre of each square and roll it up.
18. If you're freezing the pasta and baking it on another day, place the cannelloni on a piece of parchment paper side by side.
19. When you're ready to use them, add the sauce to the bottom of the tray, place frozen cannelloni in the tray, add your sauce of choice on top and then bake in the oven at 350 degrees for about 45 minutes.
Don't forget to follow my blog to get new recipes and see what's cooking in Nonnina's Kitchen EVERY week!

Buon Apetito!

With Love From, Nonnina!

Tuesday, October 7, 2014

Celli Pieni

Hello Visitors,

Today in preparation for Thanksgiving, Nonnina and I have made Celli Pieni.  Traditionally Celli Pieni were made by Nonnina's Mother back home in Italy for special occasions spent with family and friends.  They do not celebrate Thanksgiving in Italy so these were typically made around the Christmas season however, Nonnina said that if there are a lot of people getting together to celebrate, Celli Pieni are the cookies to be passed around her table.

These cookies are made with the Homemade Grape Conserva that I featured in my last post, they cannot be made with regular jam because regular jam has too much sugar.  The quality of the cookie all depends on the thickness of the jam.  Therefore, Good jam = AMAZING cookies.

When Nonnina makes Celli Pieni it is not just a task of making cookies for the holiday season, it is an opportunity for her to share love, laughter and the memory of her mother with her cousins Dolores and Lolita here in Canada.  Every year they organize a day in their busy lives to get together to bake and of course eat these delicious holiday treats.

Without Further Ado - Celli Pieni!
Ingredients:

Dough
1/2 cup of Canola Oil
1/2 cup of Crisco
1 cup of white wine
pinch of sea salt
3 3/4 cups of flour

Filling
1 cup of ground bakers dark chocolate (you can use any chocolate of your choosing)
2 cups of Homemade Grape Conserva
1 cup of ground roasted walnuts
1 cup of ground roasted almonds
The rinds of 1 orange
The rinds of 1 lemon
4 Tbsp of Grand Mariner

* This is a large dose that makes about 60, you can split it in half if you're looking to make 30 cookies, if you have any leftover filling it can be stored in the fridge for about a month or use it for other cookies.

Directions:

1. Pour oil, wine, Crisco and a pinch of sea salt in a food processor and pulse until all combined.  The Crisco is needed to make the dough flakey.

2. Add a little bit of flour at a time until you've added a total of 3 cups of flour.  Pulse until the ingredients form a dough like consistency.

3. Remove the dough the food processor and place it on a flat surface.  Add about another 3/4 cup of flour and knead it by hand until the dough becomes nice and smooth, about 4-5 minutes. Make sure to lightly flour your surface as you knead.

NONNINA'S TIP* the dough should feel a little bit harder then a pizza dough so use your judgement when adding the flour as you knead.

4. Place the dough in a plastic ziploc bag and put it in the fridge for a couple hours to chill.  This step can also be done ahead of time like the night before.

5. In a bowl, mix together the jam and chocolate until combined.

6. Add the ground almonds and walnuts and mix until combined.

7. Add the lemon rinds, orange rinds and Grand Marnier and mix until combined.

8. Rip a piece of dough off and leave the rest in the fridge to keep it cool.  Roll out the dough so its about  1mm in thickness and using a cup or a cookie cutter, cut out 3 1/2 inch circles and put the excess dough back in the pile to reuse.

NONNINA'S TIP* if the dough is made right, you do not need any flour to roll out your dough.

9. Spoon a teaspoon of the jam mixture into the centre of your circle cutout.

10. Fold the dough in half and gently press the ends shut to take the air out.

11. Using a fork push the ends closed to seal them.

12. Fold your half moons and stretch them into the shape of a fortune cookie.  Then using a fork, seal them together.


13. Place the Celli Pieni about 1 1/2 inches apart on a cookie sheet and bake in the oven at 350℉ for 15- 20 minutes turning the tray half way through cook time.

14. As soon as you remove them from the oven, roll each cookie in sugar so that the sugar sticks to the cookie.

During this holiday season make sure to remember all the things you're thankful for!
Happy Thanksgiving from Nonnina's Kitchen!

Don't forget to follow my blog to get new recipes and see what's cooking in Nonnina's Kitchen EVERY week!

Buon Apetito!

With Love From, Nonnina!